Custom Services
Applicable to
2.x
3.x
2.x
3.x
In addition to the stock port lists, custom services may be defined and stored locally in order to permit exposure of unsupported applications as well as customized port ranges:
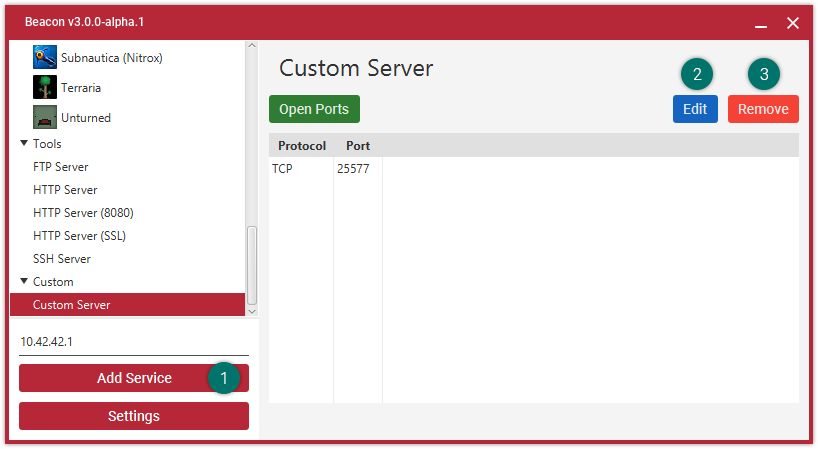
- Add Service - Opens the editor for a new custom service
- Edit Service - Opens the editor for an existing service
- Remove Service - Permanently deletes a service
When creating or editing a service, the following view is presented:
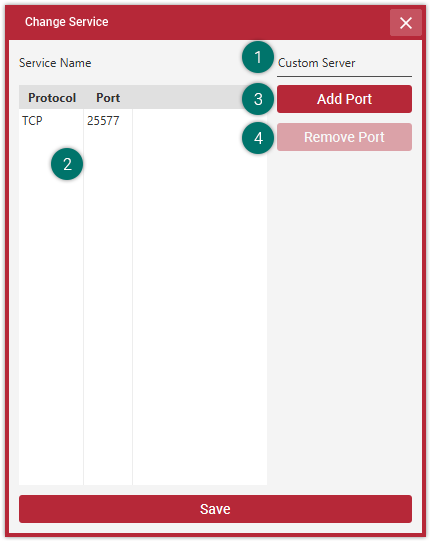
- Service Name - User specified display name for this service (non empty)
- Port List - Displays previously created ports
- Add Port - Opens the port editor for a new port
- Remove Port - Permanently removes the selected port
New ports are created via the port editor:
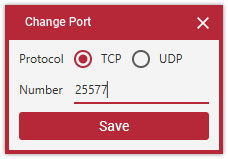
Each port is specified by a protocol (either TCP or UDP) and a port number. For more information on which port and protocol to select, refer to your respective server's documentation.
Step by Step
- Select "Add Service" from the main application window
- Enter a descriptive name (such as "Minecraft (Custom Port)")
- Select "Add Port"
- Select the target protocol (either TCP or UDP) according to your server software documentation
- Enter the port number according to your server software documentation and custom settings
- Select "Save"
- (Optional) Repeat steps 3-6 as often as necessary
- Select "Save"
Once these steps are completed, your service will be listed in the "Custom" section in the main application window as usual.